|
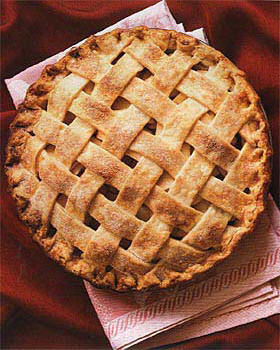
- Apple Pie
Makes: 8 servings at 48¢ each. Prep: 15 minutes. Bake: at 425° for 45 to 55 minutes. Be sure to use a deep-dish 9-inch
pastry crust for this generous apple pie. To make ahead, see our easy directions below.
2/3 cup sugar
2 tablespoons
all-purpose flour
1 teaspoon ground cinnamon
1/4 teaspoon ground nutmeg
1/2 teaspoon grated lemon rind
1 teaspoon
fresh lemon juice
21/4 pounds firm apples, peeled, cored and thinly sliced (6 to 7 cups)
1 frozen deep-dish 9-inch pastry
crust, thawed
Crumb Topping (recipe follows)
1. Heat oven to 425°. Stir together sugar, flour, cinnamon, nutmeg,
lemon rind and juice in large bowl. Add apples; mix well.
2. Place apple mixture in pastry crust, pushing down to compress.
Sprinkle Crumb Topping over top. Place on baking sheet.
3. Bake in 425° oven for 45 to 55 minutes or until apples are tender.
Check after 25 minutes; if the pie is browning too quickly, tent with aluminum foil. Transfer to a wire rack to cool. Serve
warm or at room temperature.
Crumb Topping: Combine 1/2 cup all-purpose flour and 1/4 cup packed brown sugar in small bowl.
With fingertips or pastry blender, mix in 1/4 cup (1/2 stick) chilled butter, cut into pieces, until crumbly.
To make
Pie Filling ahead and freeze: Place a large piece of plastic wrap with overhang in pastry crust. Add apple mixture as directed
in Step 2 above. Sprinkle with Crumb Topping. Fold the plastic wrap over filling to enclose. Freeze until firm. Remove filling
from crust; place filling in freezer bag, or wrap in foil. Freeze until needed. To use, unwrap and place frozen filling in
crust. Increase baking time to 55 to 60 minutes. Check the pie after 30 minutes for overbrowning. n
Nutritional Value
Per Serving: 231 calories, 7 g fat (4 g saturated), 1 g protein, 44 g carbohydrates, 71 mg sodium, 16 mg cholesterol.
|


 1. Cut the tie to measure about 1 foot (30 centimeters) starting at the wide end. Use the narrow end of
the tie for the bunny's one ear, which you would cut about 2 inches (5 centimeters) long.
1. Cut the tie to measure about 1 foot (30 centimeters) starting at the wide end. Use the narrow end of
the tie for the bunny's one ear, which you would cut about 2 inches (5 centimeters) long.